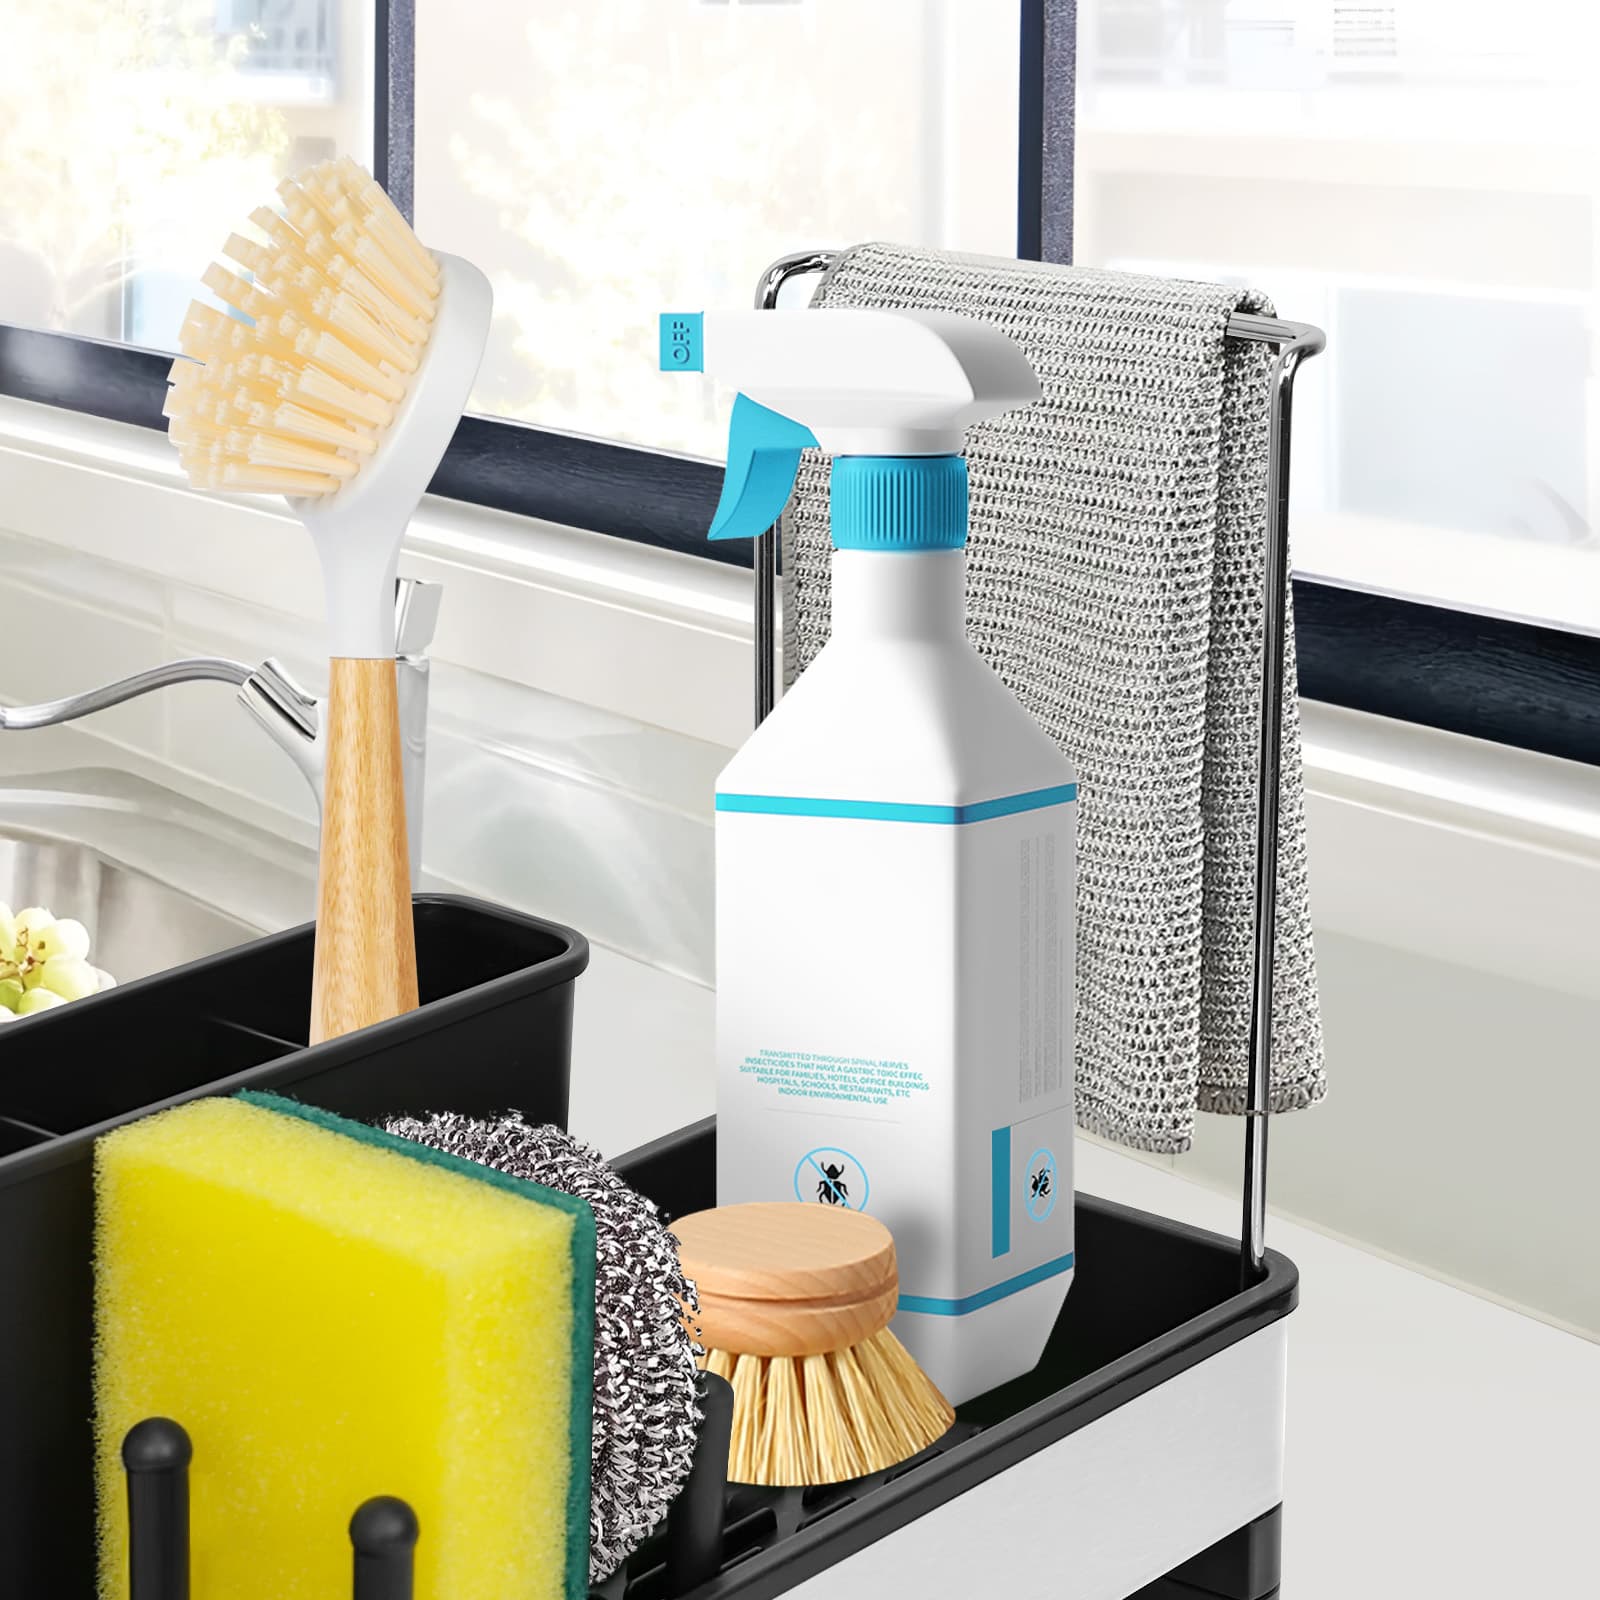
Quick Answer
To organize a kitchen sink caddy, place it on a flat counter beside the basin, point its drainage outlet into the sink, separate sponges from long-handled brushes, keep dish soap within reach and hang the dishcloth instead of burying it under wet tools. After washing, rinse each tool, return it to the same zone and clear residue from the tray and drain path.
Who this setup helps
Start with the tools you actually use at the sink
This setup is for home cooks, apartment households and shared kitchens where a sponge, dish brush, soap bottle and dishcloth tend to spread across the counter after every cleanup. The goal is not to store every cleaning product in one place. It is to give the small set used during normal dishwashing a predictable position close to the basin.
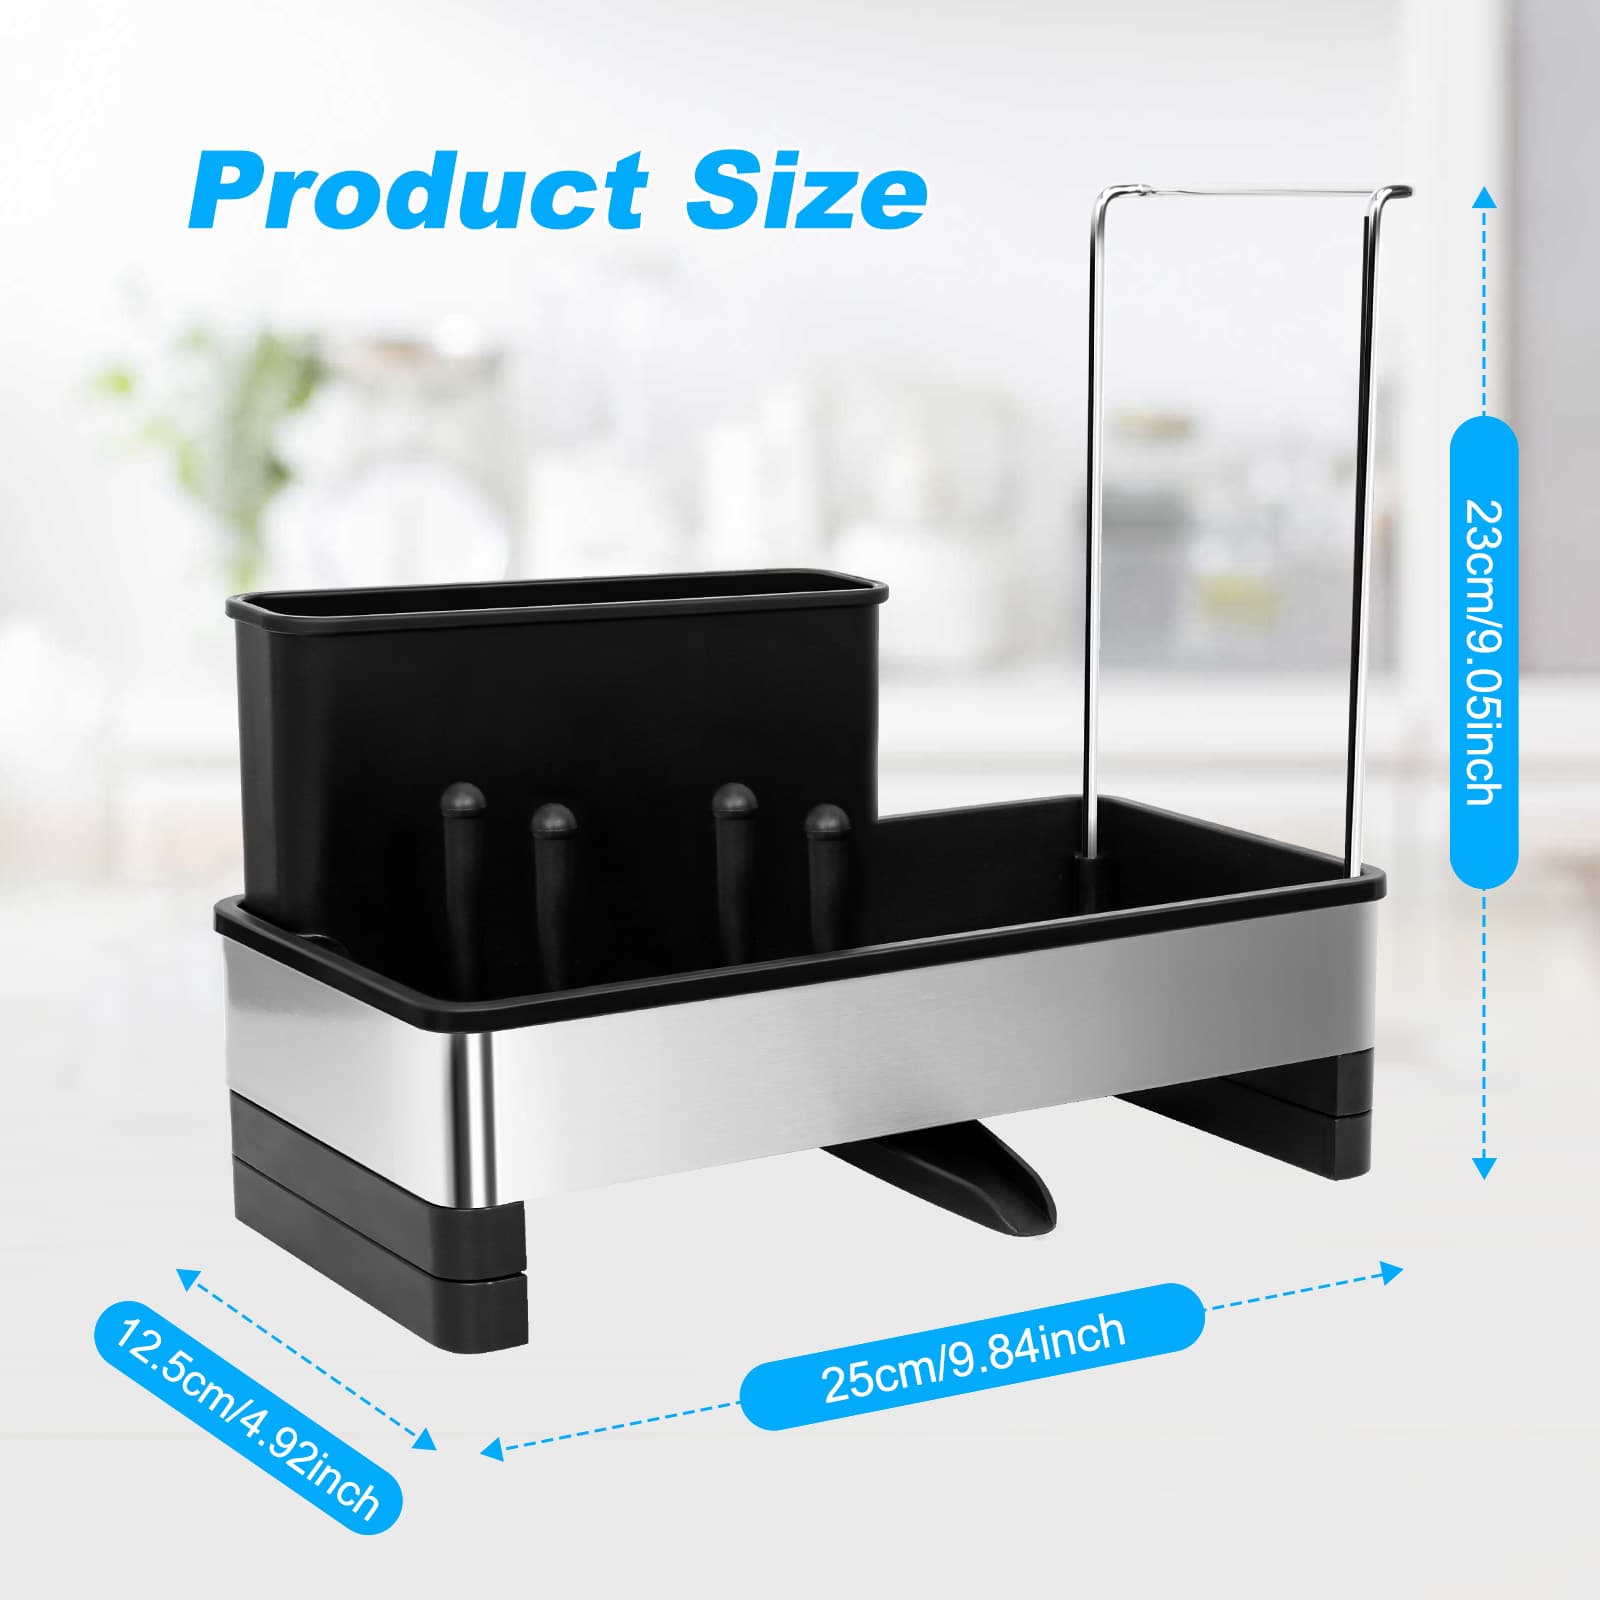
Before choosing a location, gather the tools used during one ordinary cleanup. Remove duplicates, empty bottles and items that belong elsewhere. Then measure the available counter. The Obsoorth black sink caddy is 9.84 inches wide, 4.92 inches deep and 9.05 inches high, so the location also needs vertical clearance for the hanging rod and taller brushes.
Suitable conditions
- A flat countertop beside the sink
- Enough room for the verified footprint and tool handles
- A position where the drainage outlet can reach the basin
- A small, repeatable set of sponges, brushes, soap and cloths
When another setup may work better
Choose a different location or organizer if the counter is smaller than the caddy footprint, the outlet cannot point into the sink, overhead cabinets block the brush handles or your routine requires more tools than the compartments can hold without crowding.
Step-by-step
How to organize a kitchen sink caddy
Step 1
Measure the counter space beside your sink
Reserve a flat area that can accommodate the Obsoorth caddy's 9.84-inch width, 4.92-inch depth and 9.05-inch height. Include clearance for the dishcloth rod and the handles of taller brushes.
Step 2
Place the caddy where its drain can reach the basin
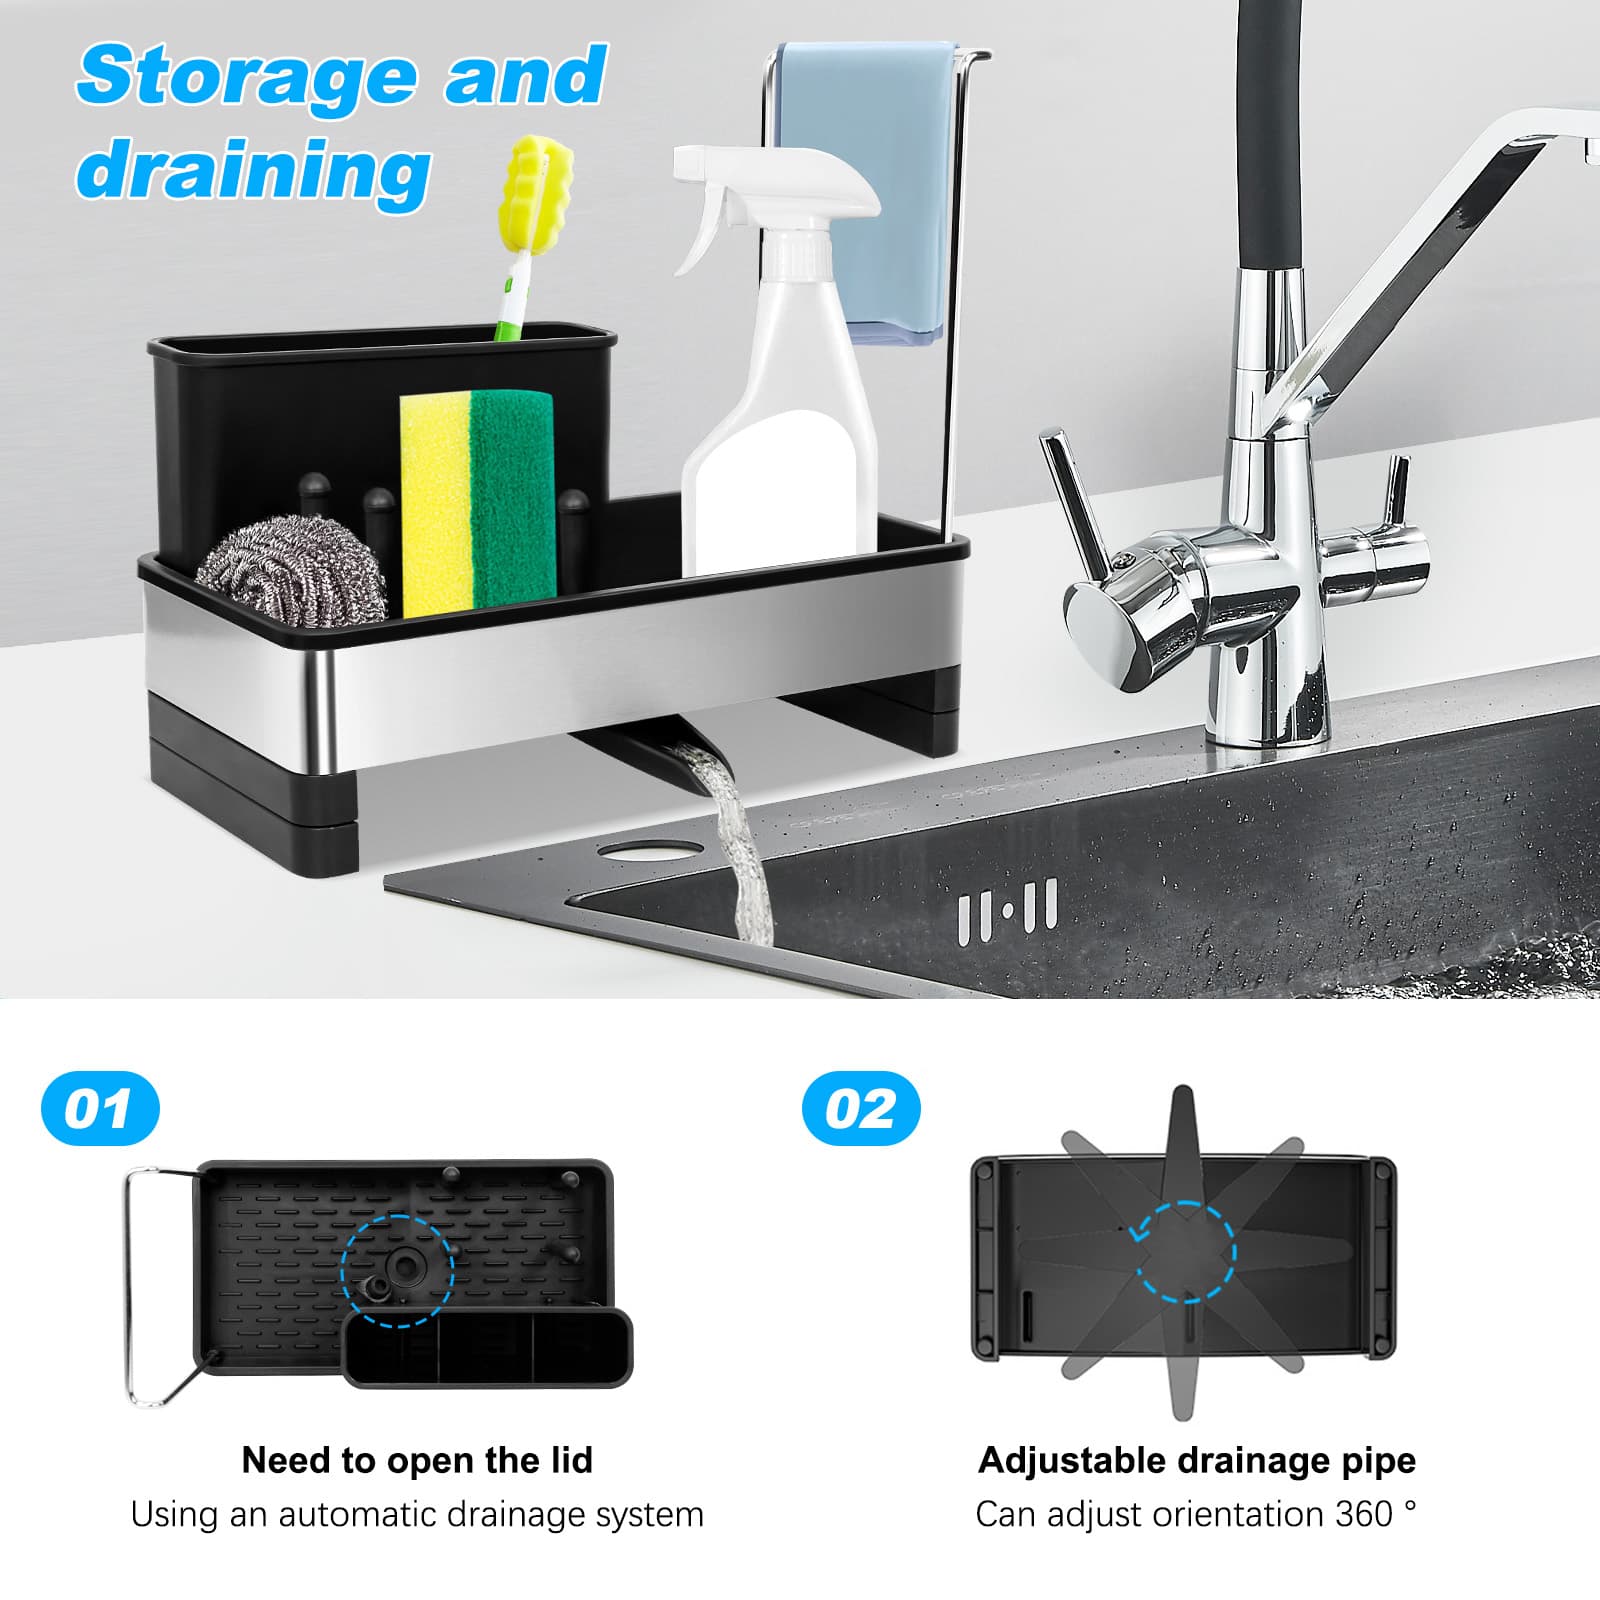
Set the caddy on a stable countertop next to the sink. Rotate the adjustable drainage pipe so its outlet points into the basin rather than toward the counter or floor.
Step 3
Separate sponges and scrubbers in the front section
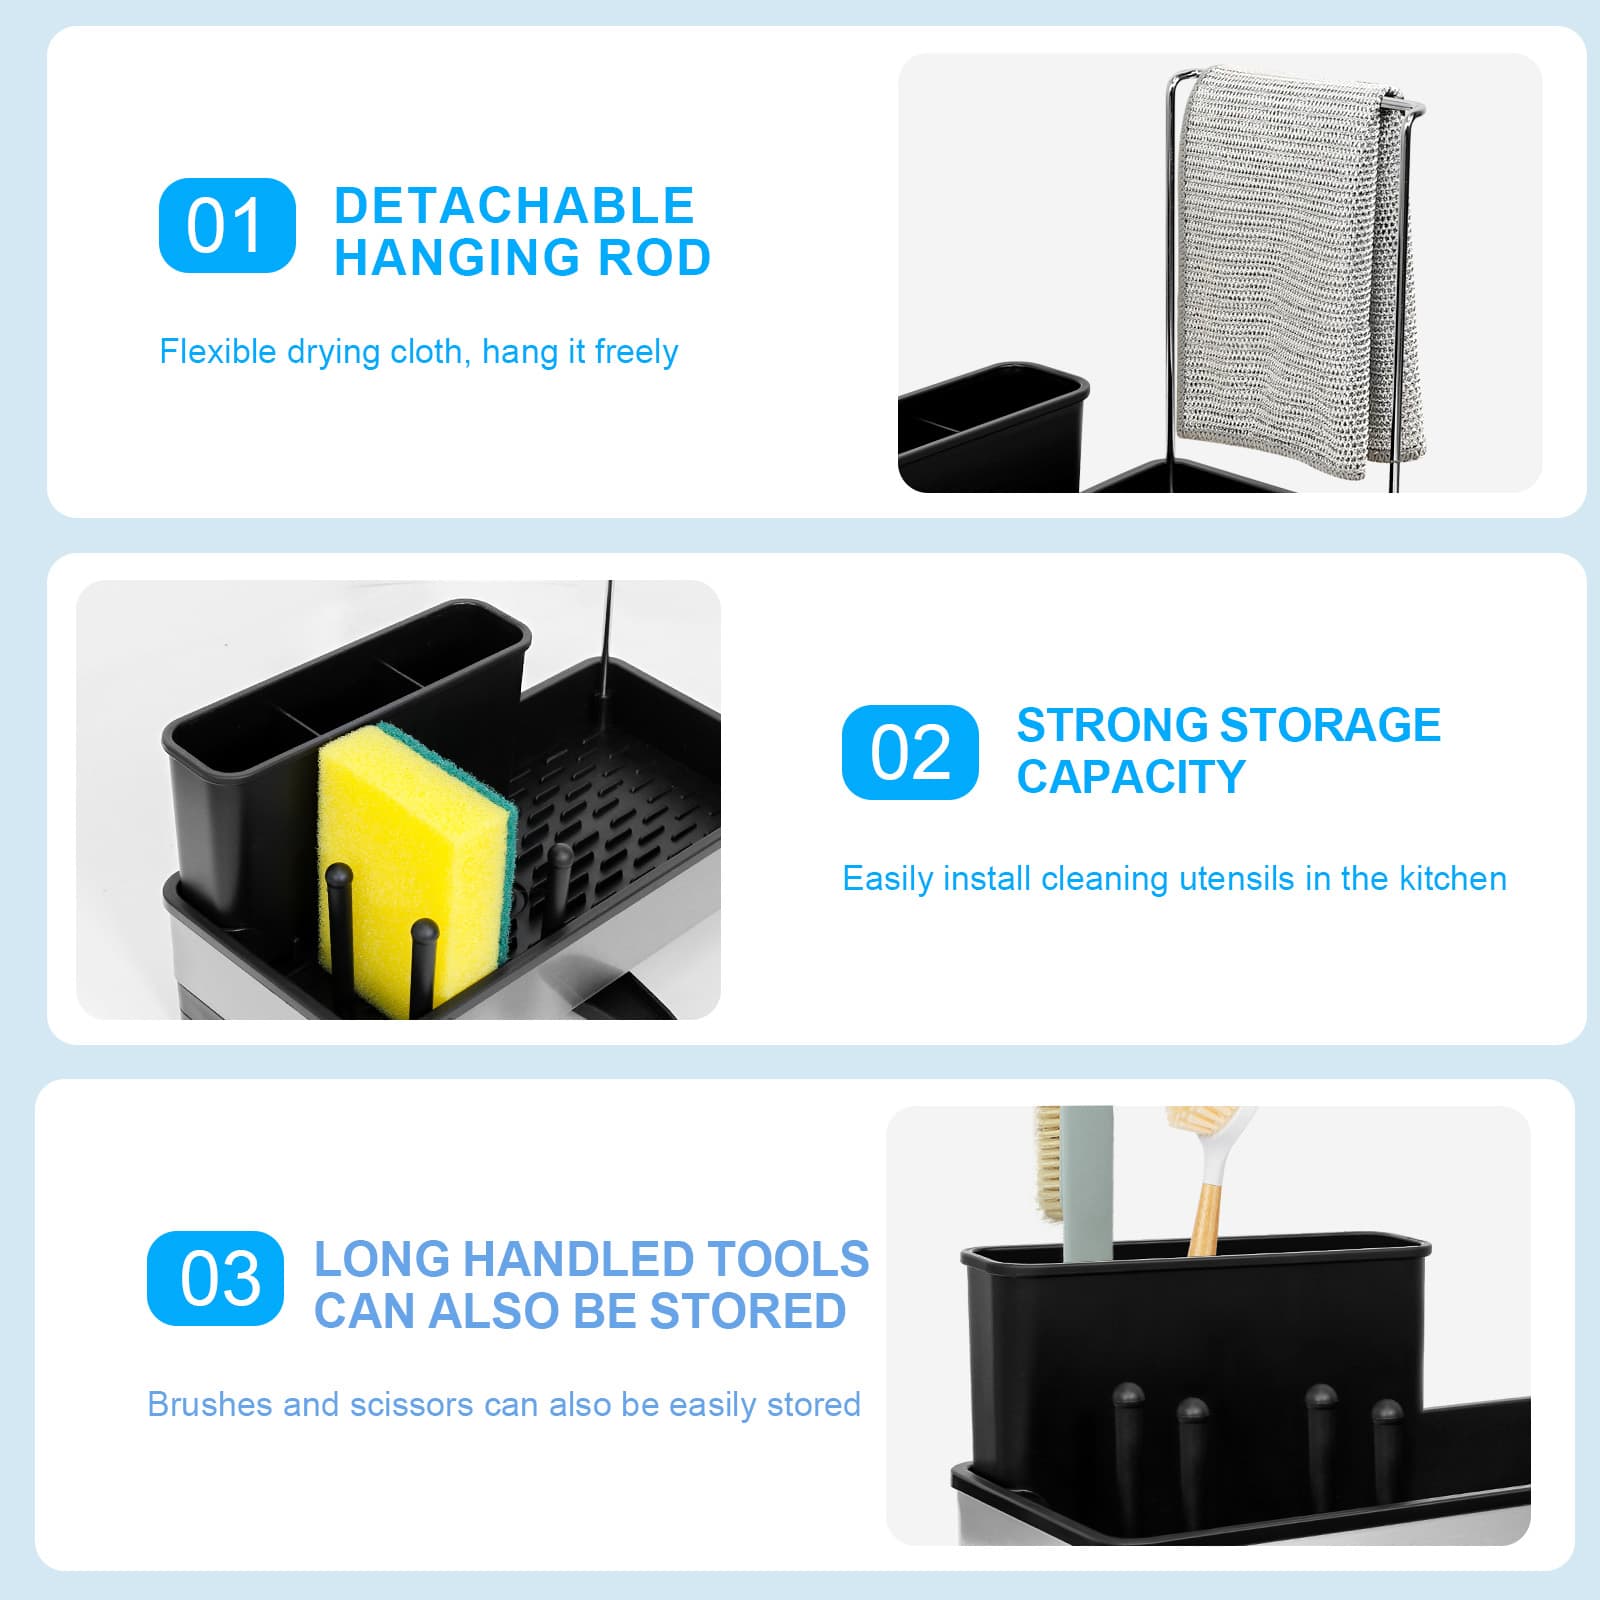
Use the divided front area for the sponge and other compact scrubbers you reach for most often. Keep them upright instead of stacking wet items into one dense pile.
Step 4
Put long-handled brushes in the tall compartment
Place bottle brushes, dish brushes or similar long-handled cleaning tools in the raised rear compartment. Check that each tool stands securely and does not interfere with the dishcloth rod.
Step 5
Keep dish soap accessible and hang the cloth
Place the soap bottle in the open section where the pump or cap remains easy to reach. Drape one dishcloth over the detachable hanging rod so it is not buried beneath sponges or brushes.
Step 6
Test the layout after one normal cleanup
Return each rinsed tool to its assigned position, then confirm that collected water follows the drainage pipe into the sink. Adjust the pipe or reduce crowding if water or tools are not sitting as intended.
Use it as a routine
Reset the sink area after each cleanup
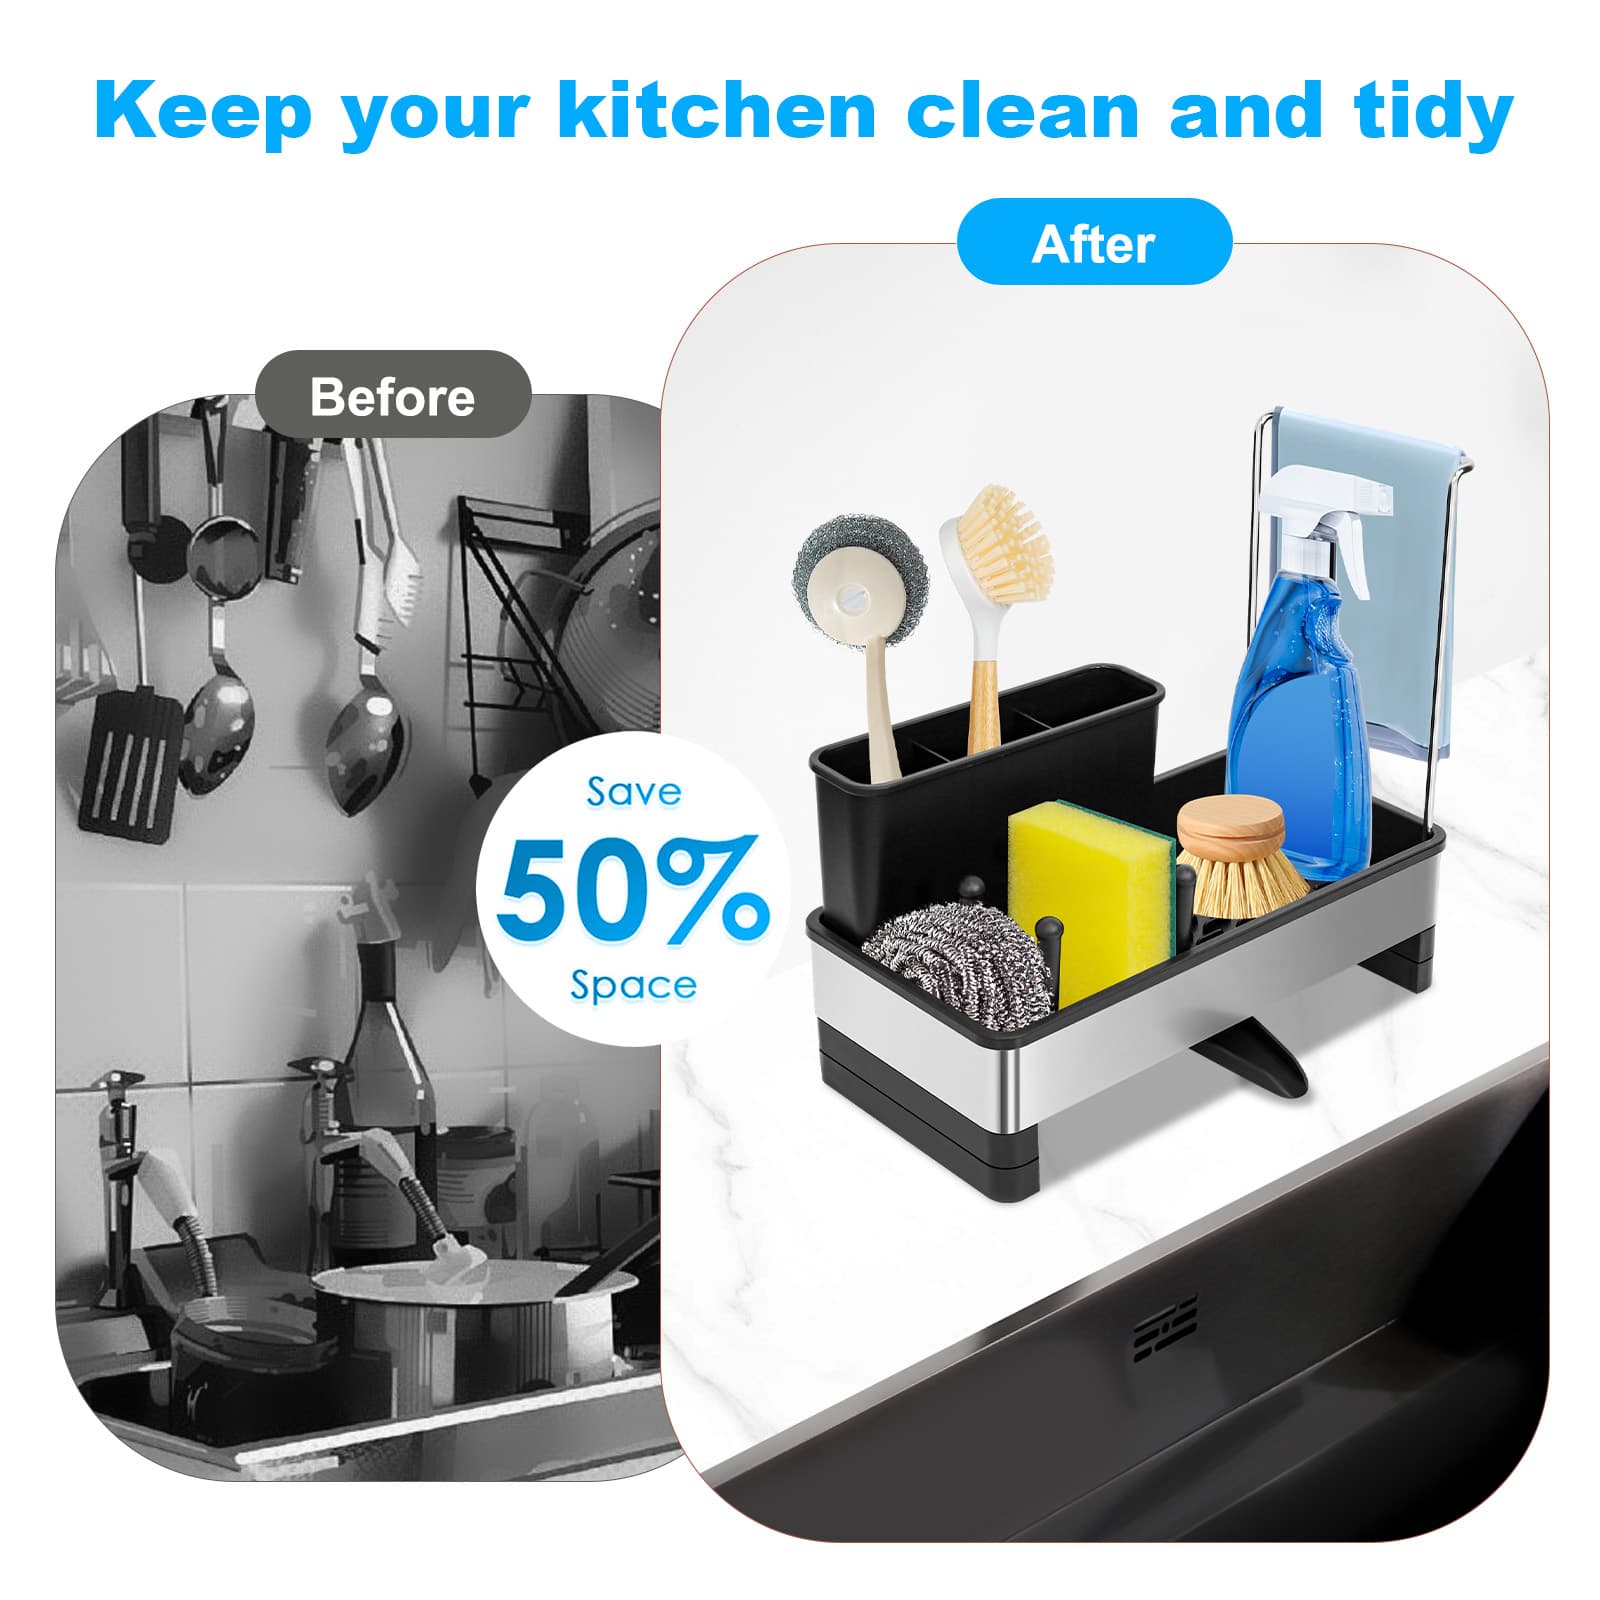
A caddy stays useful when every item has one repeatable return point. Put the sponge in the divided front area, stand the brush in the taller rear compartment, return the soap bottle to the open section and hang the cloth over the rod. This makes the next cleanup easier because the tools remain visible and can be picked up without moving several other items first.
Before returning a sponge or brush, rinse away food residue and remove excess water. Do not compress several wet items into the same narrow space. Leaving air around the tools and keeping the drainage path unobstructed helps the organizer work as intended without making unsupported claims about drying speed or sanitation.
Common mistakes
Avoid crowding and misdirected drainage
Pointing the outlet onto the counter
Check the drainage direction after moving the caddy or wiping the counter. The outlet should remain over the basin.
Stacking wet tools together
Use the separate zones instead of pressing several sponges, cloths and brushes into one pile.
Hiding the cloth under other items
Use the detachable rod for one dishcloth so it remains visible and easy to remove.
Blocking the drainage path
Keep loose debris and small items away from the tray opening and adjustable outlet.
Ignoring the verified dimensions
Measure the counter and overhead clearance before purchase, especially beside compact or corner sinks.
Using it for unstable or sharp items
Keep knives and tools that can tip, cut or protrude dangerously in storage designed for those items.
Cleaning and maintenance
Clean the caddy before residue builds up
Remove the soap, brushes, sponges and cloth before cleaning the organizer. Clear visible residue from the compartments, tray and drainage outlet, then wipe or rinse the surfaces according to the instructions supplied with the product. Recheck that the adjustable pipe moves freely and points into the sink when the caddy is returned to the counter.
Let the organizer and its contents dry before reloading. The current verified product information identifies the caddy as stainless steel but does not state that model OB-2003BL is dishwasher safe, so do not assume a dishwasher cleaning method unless the packaging confirms it.
Selection checklist
What to check before choosing a sink caddy
- Measure the counter width, depth and overhead clearance.
- List the sponge, brushes, soap and cloth used every day.
- Confirm the drainage outlet can be aimed into the basin.
- Check that long handles will stand without hitting a shelf.
- Review the verified material, dimensions and real product images.
- Use the exact product page and Amazon listing for the selected model.
The guide shown here uses the black Obsoorth model OB-2003BL. Review its verified dimensions, images and product details on the Black Stainless Steel Kitchen Sink Caddy product page, or compare the wider Kitchen Organization collection.
Create a repeatable sink reset
Keep everyday cleaning tools together and directed toward the sink
Explore the Obsoorth black countertop sink caddy, its separated storage zones, detachable dishcloth rod and adjustable drainage pipe.
Frequently asked questions
Kitchen sink caddies, answered
What should go in a kitchen sink caddy?
A sink caddy can group the wet cleaning tools used around the basin, such as a sponge, compact scrubber, dish brush, dish soap and dishcloth. Store only items that fit the available compartments without crowding or tipping.
Where should a countertop sink caddy be placed?
Place it on a flat counter beside the sink where frequently used tools are within reach and the drainage outlet can point into the basin. Measure the available counter space before choosing the position.
How does the Obsoorth sink caddy drain?
Model OB-2003BL has an adjustable drainage pipe that rotates 360 degrees. Position the outlet over the sink and keep the drainage path clear so collected water is directed toward the basin.
Can the sink caddy hold long-handled brushes?
Yes. The verified product design includes a raised compartment intended for long-handled kitchen cleaning tools. Check that the brush stands securely and fits beneath any cabinet or shelf above the counter.
What are the dimensions of the Obsoorth black sink caddy?
The verified dimensions are 9.84 inches wide, 4.92 inches deep and 9.05 inches high, or 25 by 12.5 by 23 centimeters.
How should I clean a kitchen sink caddy?
Remove the contents, clear residue from the compartments and drainage path, and wipe or rinse the surfaces according to the care guidance supplied with the product. Let the caddy and tools dry before returning them to their positions.
Is the Obsoorth sink caddy dishwasher safe?
The current verified product information does not state that model OB-2003BL is dishwasher safe. Follow the care instructions supplied with the product and use hand cleaning unless the packaging confirms another method.
Continue reading